Tuesday, October 30, 2012

Motor meets Chassis....

Today was a major milestone for the restoration in that I was able to drop the motor into the chassis after several years (nearly 5) since I startd the project. It only took 5 minutes to get them connected .... 


Monday, October 29, 2012

Final Engine Assembly

I bought a Summit Cam degree kit and spent several hours trying to figure out how to get it timed and use the kit and then a few more hours actualy verifying the correct specs from the Comp Cam card.  In the end it was perfect and didn't need any adjustment but it certainly taught me a lot about the precision of the camshaft.


Below is a nice shot of the heads with the new Manley valves.  The previous owner had work done to the heads on the intake and blending the bowls so they actually turned out quite nice.


Here you can see the shot after the first head was installed and preparing for the second.  The next shot shows the Fel-Pro PermaTorque multiple layer steel head gasket.


Finally putting the oil pan on the motor.  The first gasket that I had was a one-piece from Fel-Pro but it was just too thick to work so I went with the traditional 4-piece and plenty of gasket sealer.


A nice picutre with the heads and retangular port intakes!

 
All taped and ready to paint, it took about 3 hours to get everything taped up nice...

 
Hers' the result after 2 cans of Dupli-Color Chevrolet Orange, there were still some light spots so I purchased another can and covered the motor again.


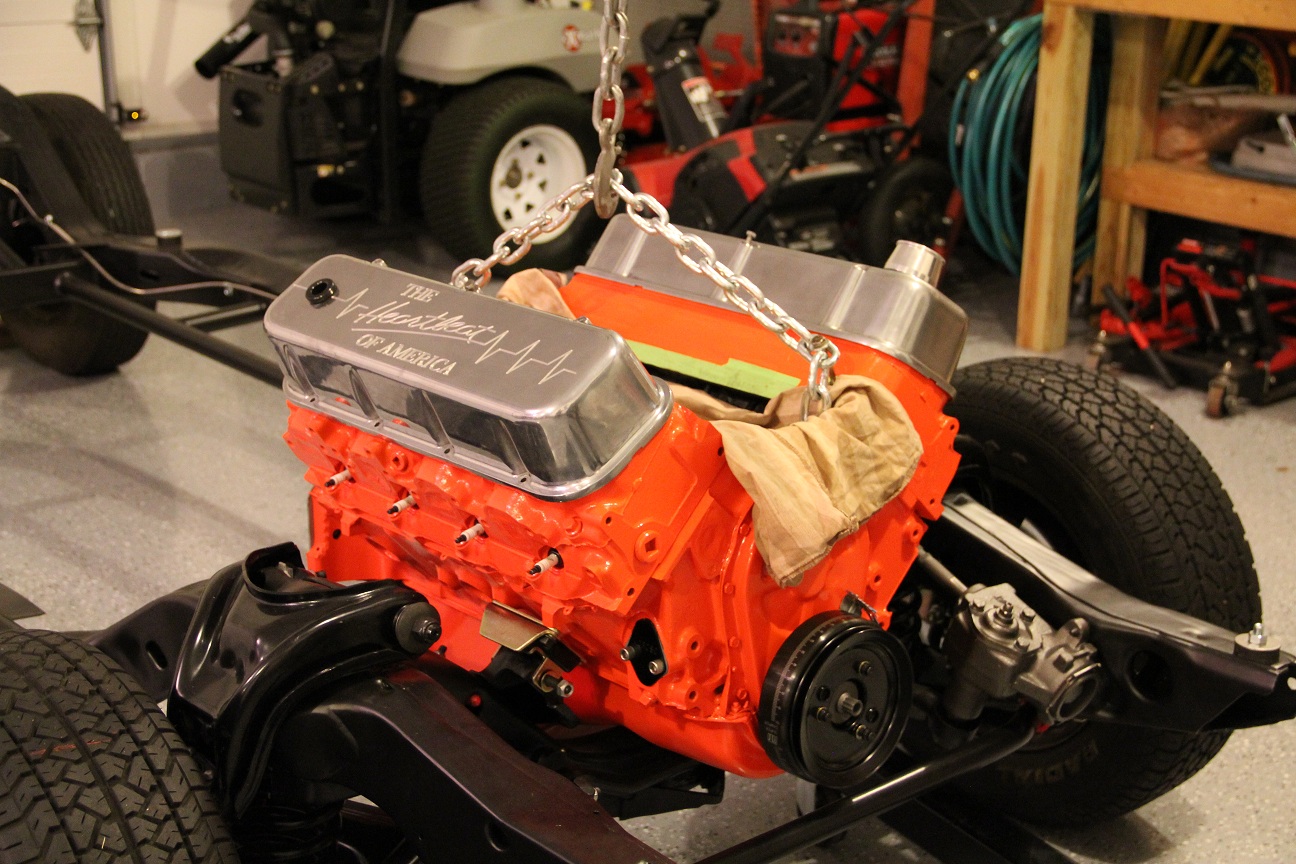
Now I need to finish using the blaster (glass bead) on the intake manifold to give it a nice finish and then the motor should be ready to bolt up to the frame.  I have some work to do on the used Lakewood bellhousing to clean it up and paint as well as remove the nuts that were welded to the plate.  Once that is completed I have everything needed to merry the engine & trans and then finally set inside the rolling frame!

Sunday, October 21, 2012

Engine Assembly & Rearend

WOW, it's finally time to assemble the engine. 
 
I dropped off the parts right after labor day and got them back after a long 6 weeks.  The first step was to layout the parts for assembly and do some cleaning to ensure the parts are ready to go.  Below you can see all of the parts laid out on the floor the only unfortunate thing is that the windage tray and stud kit had to be returned.  
 

The machine work was completed by E&G Automotive in Wallingford, they did a great job with he machine work!  Everything mic'd out perfectly fine and the block and all parts were ready to assemble.


Below are pictures after the crank, rods/pistons and cam were installed.  I checked the main bearing clearance with plastigage and it was right on the spec at 0.003.   I also checked the rings and everyone was fine except the #6 cylinder top ring that I had to file with the oil ring gap of 0.015, the 2nd ring 0.020 and the top ring 0.017.  I used the dial indicator from the cam degree kit to check the crank endplay and it was 0.006.


Here's a view from the bottom, below the oil pump you can see the plat that should help keep the oil from splashing the rear main during take off :)  Otherwise nothing special here, just a good Melling oil pump and rod.


Here you can get a real perspective of the dome and compression, notice the #6 piston at TDC, the pistons are SPR 73, which I think based on the 118cc head should put the compression ratio at about 12.25:1 to 12.5:1.


In addition to the engine I also got the rearend back on Friday.  It was rebuilt with a 4-series posi holding 4.10 gears.  The rearend had to be straightened and overall I think it came out quite nice given how it started out.   I had to remove the ladder bars and coil spring struts that were welded on the rearend and then install the factory brackets.    I added the QA1 anti-hop bars along with adjustable uppers and then the F41 boxed lower control arms along with the sway bar.  There's new coil springs and I'll be adding Competition Engineer adjustable shocks.


Here's a close-up of the QA1 anti-hop bars which change the upper mounting point by about 3 inches which should give a much better angle and also provide more adjustments.


Wednesday, October 3, 2012

M22 Trans is here!

The new transmission arrived today, WOW!  The packaging was great and it arrived safe and sound just as Bob had committed to.    The transmission looks great and is ready to install (minus fluids) so now I just need to have the rearend and engine which are due this week.
 
For those looking for great service and a great product at a good price give Bob at Four Gear Transmission (http://fourgeartrans.com/id4.html).
 
The transmission is a M22 Close Ratio with a 2.20 first gear with 26 spline input and 32 spline output.  It's also loaded with the latest from Auto Gear with the Main Case, Tail Housing and Side Cover and even comes with a 12 month warranty.
 
Here's all of the parts that went into the final product.  
 
 
Here's the final product which looks great!
 
 
Here's the other side of the transmission, you can also see the new Poly Graphite Transmission mount.