This past weekend I spent working on the frame to complete the previous work to box the frame and then added some additional structural support. As the say there is a cost for everything and for the additional support it's probably about 100lbs of additional weight. However, it's really MUCH stronger now. Before any of the work the frame would twist very easily and now it's truly structurally sound. You can step on the front passenger frame and the entire frame lifts from the rear, not just the drivers rear.
So now the big challenge is moving the frame :) I had to use my engine lift to be able to maneuver it around the garage so that I could do the clean-up. The pattern I followed can be found on-line in several pictures but it essentially entails boxing the frame and then adding parallel supports along the frame rails. I still need to add some brackets for the transmission mount but aside from that the center section is complete.
Here's a shot of the reinforcement in the rear. For the SS model there is a bracket (1/8" flat steel) that goes from the upper to lower mounts. Instead of that I've added 1 5/8" DOM tube that ties directly to the cross tube and subsequently to the front of the car. This should eliminate any flex in the frame during launches.
As you can see from the photo above and the one below the drive shaft hoop is centered while the rearend is not. I'm going to cut one side and move it 1" to the passenger side to account for this and then everything should be fine.
One additional place I need to add some support is on the upper mounts behind the rear spring to reduce the flex from left-right.
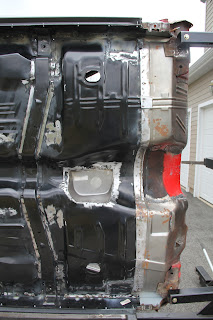
One step forward two back, as you can see from the bottom of the car where the grey paint is the new frame supports touch the bottom of the floor and the center cross-brace. Had it been another 1/2" it would have been fine however it's too close.
Here's a close-up of the area impacted and it's really not that bad, probably 2-3 hours of work to fix it with a minor change to give 1/2" to 3/4" of clearance to be safe. The main issue is that the rear floor is about 2" lower than the front and it just makes it too close. I took the other pictures on-line as de-facto "it shouldn't touch" and I should have measured or better done the mock-up with the body on the frame to be sure. Oh well, live and learn.
Up next ...
- Re-weld the front frame horns with the new welder (better to be safe) and add some additional support
- Fix the rear-frame where I shortened it and also fix the passenger rear frame which is lower (3/4") due to being in an accident at one point
- Fill the un-used holes in the frame and re-weld the factory welds, some are pretty nasty
- Fix the floor due to the new frame supports
- Finish welding the underside of the body


